How to Make a Family Tree in Microsoft Word
A family tree is a descriptive diagram that represents family unit relationships in the form of a nautical chart. Information technology is useful for establishing lineages in a traditional tree format that is easy to empathise, even for children. Creating a family tree in Microsoft Word can exist a great style to kickstart your journey in genealogy. The powerful diagramming tools and hierarchical approach of Word make these trees perfect for beginners. Read on to know about the steps that tin can help you lot brand a family unit tree in word.
Step 1: Select the Blank Document

- Open up the 'Microsoft Word' awarding on your calculator.
- If you are using the latest Microsoft Function, you will exist given many different options. Choose "Blank Document" to begin.
- If you lot are using a version older than Word 2013, click the Role/File button on the peak-left corner and click "New". Select the option of "Blank Document".
Step ii: Select the SmartArt Option
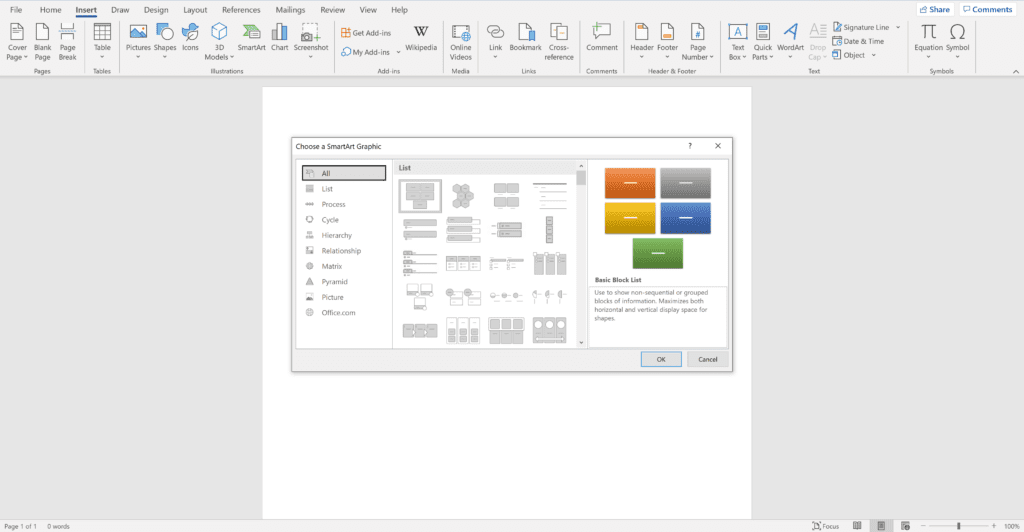
The basic structure of the family unit tree will be made by using this special tool in the Word.
- Click the "Insert" tab on the main menu.
- Select the "SmartArt" option. This volition open up a dialogue box with several dissimilar options to make your family tree.
Step 3: Select the Hierarchy Option
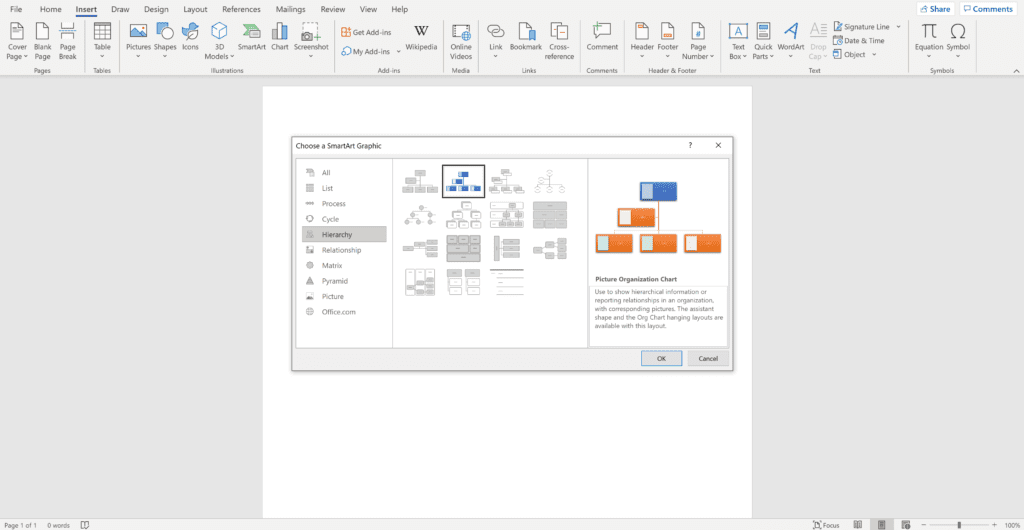
- Click the "Hierarchy" tab on the left-hand carte. This volition give you lot some hierarchical charts to choose from.
- Select the choice of "Motion picture Organizational Chart". The structure of this chart is quite similar to that of a family tree.
- Click "OK" to insert the nautical chart on the blank document.
Step 4: Enter the Names of Family Members
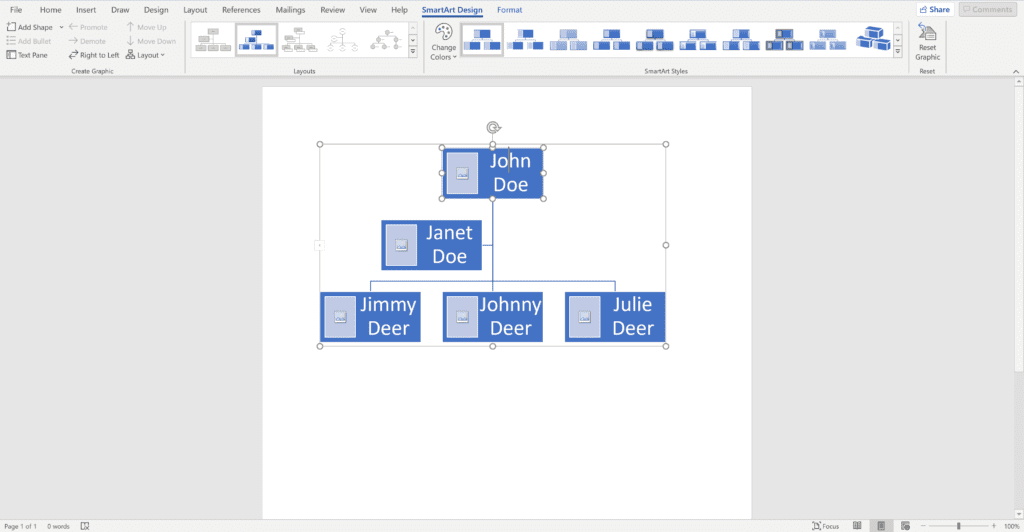
The inserted family tree will have 3 generations. You can accept them as your grandparents, parents, and yourself.
- Click the topmost box and enter the proper name of your gramps.
- And so, click the box underneath the top box and blazon in the proper name of your male parent.
- At present, motility to the box representing 3rd generation and enter your proper name.
Stride v: Add New Family unit Members

For adding a new box, you lot demand to select a box that is already at that place at that level. For example, if you want to add a box for your female parent, you will take to select the box of your begetter.
- Select the box representing the father in the family.
- Click on the "Add Shape" button on the top left of the screen. This volition add the new box to the tree.
- Click on the new box and type in the name of your female parent.
Step 6: Add together Details of Family Members

It is incredibly easy to add information, similar altogether and place of birth, to your family tree in Microsoft Give-and-take.
- Click the family member for which yous desire to add the information.
- Blazon the new details and the Word will keep adjusting the font on its own.
- If this doesn't happen, select the newly-added information, click the Home tab on the main menu, and reduce the font.
Footstep 7: Add together Pictures of Family Members
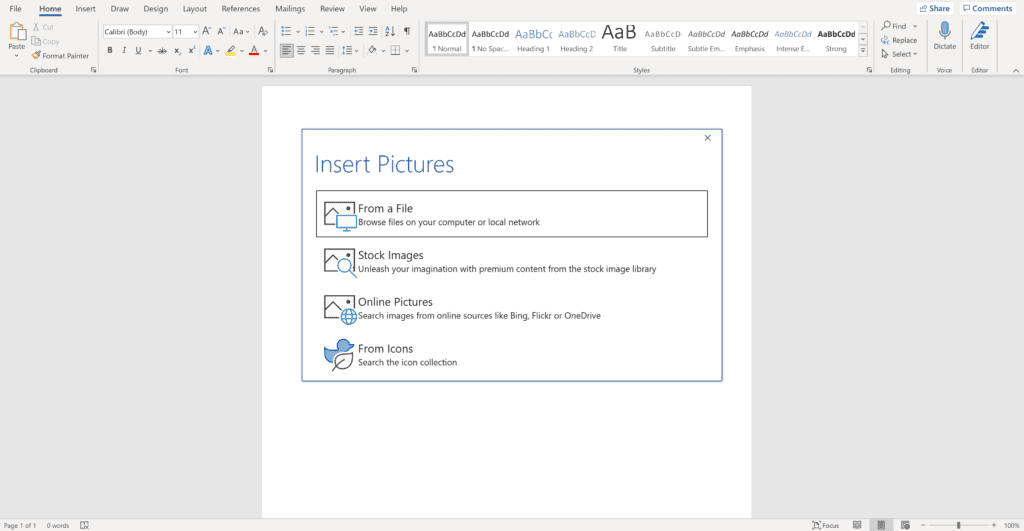
This is a really fun improver to any family tree and volition enhance its visual appearance.
- Click the image icon on a family member and wait for the dialogue box to announced.
- Select the pick of "From a File" in the dialogue box.
- Navigate through your computer'due south data to discover the picture of your choice and select information technology.
- Click "OK" to add together an image to your family tree.
Footstep 8: Utilise Colors to Stand for Gender

Using different colors for unlike genders can be an excellent style to increase the readability of your family tree.
- Select and right-click the box of a family unit member.
- Click the "Fill" option on the carte that appears.
- Choose the colour of your pick and bring a new dimension to the tree.
Step ix: Add New Generations
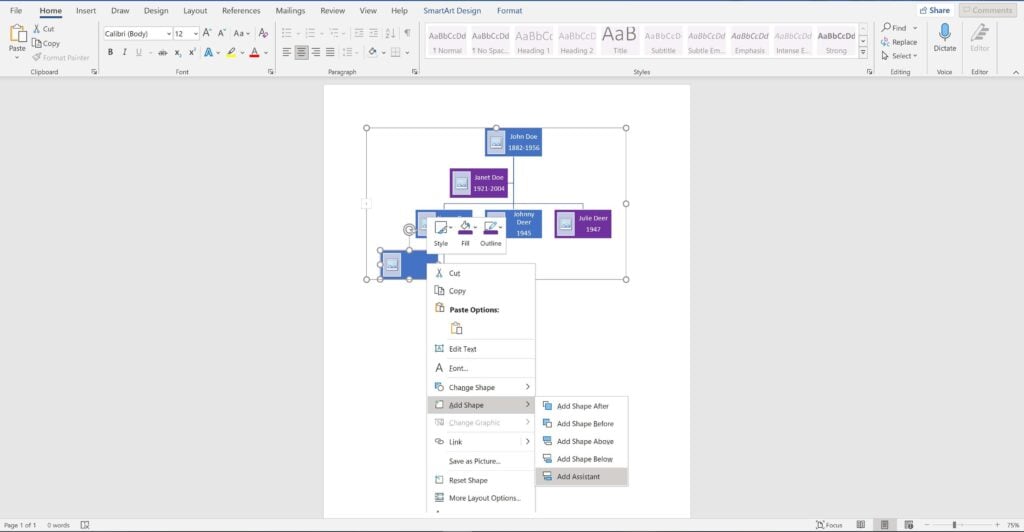
- Select the family member on the chart from where you want to add a new generation.
- Click on the "Add Shape" drop-down menu on the acme left of the screen.
- Select the pick of "Add together Assistant" from the menu. This will create a new level in the family tree.
Step 10: Change Orientation to Mural
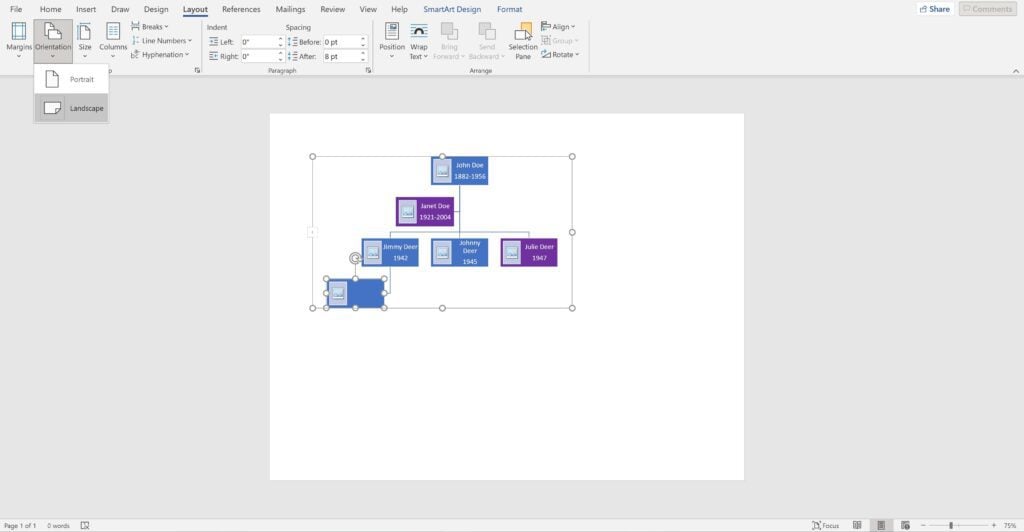
When the family tree starts growing, it can be difficult to run across it (completely) in standard settings. Therefore, you will demand to brand some changes to the layout.
- Select the "Layout (or Page Layout)" from the main menu.
- Click "Orientation" and a drib-down card volition appear.
- Change the orientation from "Portrait" to "Mural".
Pace 11: Accommodate the Size of the Family Tree
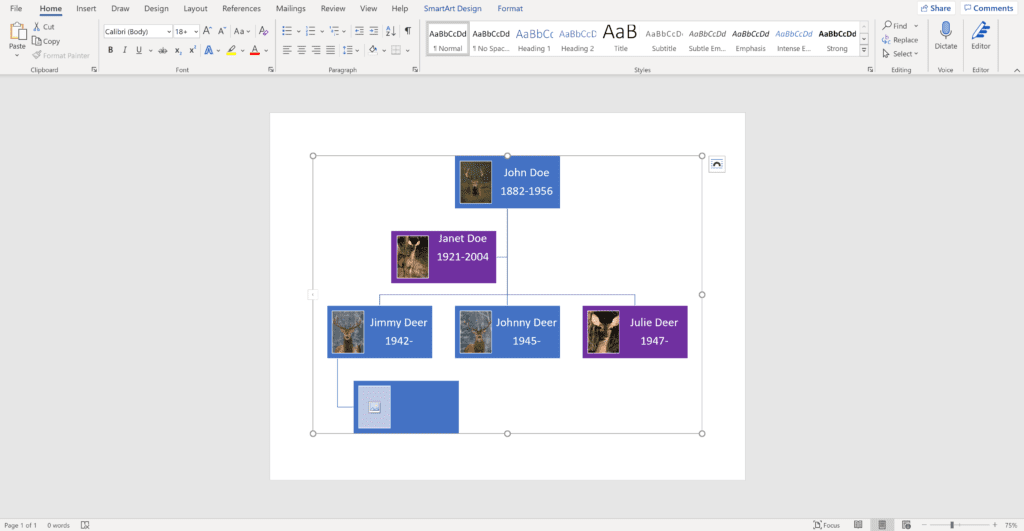
It is important to alter the size of your tree if it's going beyond the layout of the page. This method allows you to practise this on the get.
- Select the family unit tree.
- Click on whatever of its corners and drag the unabridged tree outwards or inwards. This will trigger the Give-and-take to automatically adjust the family tree according to the new height.
Step 12: Save the Family Tree
In one case your family tree is complete, don't forget to relieve it or all your hard work will be wasted.
- Click the Role/File push button top-left corner to open a driblet-down card.
- Click "Relieve" from the menu to save the document. Alternatively, you tin can printing "Ctrl+southward" for this purpose.
The Legal Stuff
Please keep in heed that when y'all click our links and make purchases, we may receive a small commissions. This does not impact our reviews and comparisons every bit I endeavor my all-time to go on things fair and balanced, in order to help you lot make the all-time choice for you.
moralesexpearl1964.blogspot.com
Source: https://roottobranches.com/how-to-make-a-family-tree-in-word/
0 Response to "How to Make a Family Tree in Microsoft Word"
Postar um comentário